Why do you need so many brushes is one of the most frequently asked questions by the visitors to my home. The thing is that my other make-up stuff is neatly hidden in the drawers and the brushes stand up proudly and shamesly and catch everybody's attention. They instantly reveal my hobby, which many people believe to be nonsensical and I guess I should be ashamed of. If I collected stamps or stickers, that would be a different matter, but make-up?
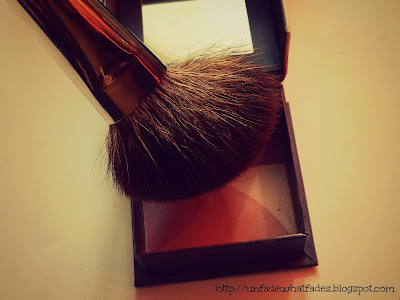 |
| Kozlowski R-CB 635 |
So, I repeat the question again: why I need so many brushes? Because they all serve a different purpose. Because sometimes a product which seems crappy simply needs the right tool to use it with. Because you may achieve different results using the same product. Because they are pretty and please my eye when I look at them.
This is going to be my attempt to do a 'favourite brushes' post, but I'd like to approach the topic from a slightly different angle. Today I'm about to discuss the face brushes that I use daily, and expect a similar post about eye brushes in the near future.
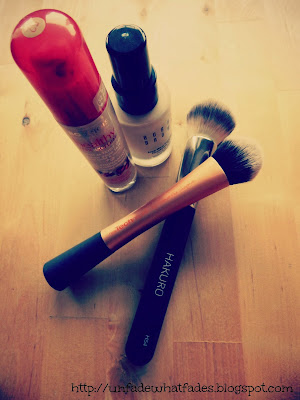 |
| Real Techniques Expert Face Brush and Hakuri H54 |
For liquid foundation I like dense synthetic duo fibres like Hakuro H54 or Real Techniques Expert Face Brush, which buff the product flawlessly into the skin and offer fairly high coverage. Synthetic brushes don't 'eat' foundation and are easy to wash and reshape.
For sheerer coverage I can obviously recommend using a stippling brush like this one by ELF, though I tend to reach for the two buffing brushes mentioned above much more often.
If my foundation tends to settle in the pores I always grab any drugstore sponge wedge and dab it all over my face. This simple trick helps remove excess product which would later clog my pores and stimulate sebum production. Removing excess foundation prevents setting powder from caking and oxidising.
Some foundations actually look better when applied with sponges, eg. the Beauty Blender which provide more even and less excessive coverage. When my foundation underperforms, looks streaky or migrates on my face, I always try different methods of application and in most cases with the appropriate tools you can get the most wanted results.
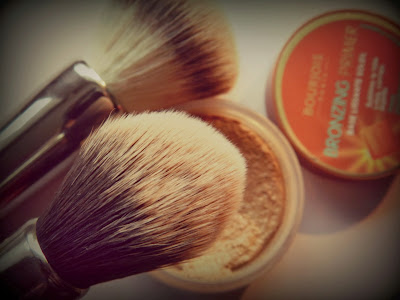 |
| Hakuro H14 and Hakuro H55 |
Other cream face products will also need synthetic brushes. Cream bronzers are pretty rare on the cosmetic market, but I happen to own the Bronzing Primer by Bourjois which I apply either with my HakuroH55 (large fluffy brush) when I want to add some all-over summer glow to my face, or the tapered HakuroH14 to contour. These two brushes are perfect for cream products, but they don't perform so well with powders. Powders don't seem to cling to the soft and smooth bristles so the brushes pick very little product.
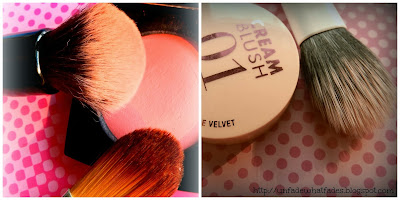 |
| Sephora Mineral Powder Brush and a flat foundation brush (left) and Real Techniques Duo Fiber Contour Brush (right) |
Cream blushes are very difficult to work with, they tend to slide off my face when blending leaving bold patches where I blended them too much, which is usually in the middle of my cheek. I figured out that patting the blush onto my cheeks with a flat foundation brush like this fake MAC 190 (yes, I got a fake MAC brush set on e-bay when I was just getting into make-up, thinking I'd grabbed a bargain) or with a small buffing brush like Sephora Mineral Powder Brush. For a sheerer wash of colour I like to use the small Real Techniques Duo Fiber Contour Brush. This brush is no good for contouring with powders, but for patting on a blush it's perfectly fine.
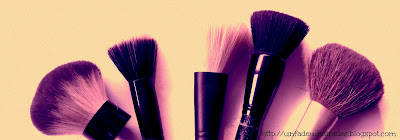 |
| ELF Studio Kabuki, Studio Stippling Brush, Bamboo Powder Brush, Studio Powder Brush and a no-name powder brush |
Once you are done with all your cream products you may want to dust your face with some powder. My absolute and all time favourite in this department is the large and fluffy ELF Studio Kabuki Brush to use both with loose and pressed powders. For a sheerer coverage I grab one of my ELF powder brushes or their stippling brush to apply even less powder. I generally like soft, and non-prickly brushes and having one of those mentioned above is quite enough to use with most powder products I own, however, there are some pressed powders which are much harder and require tools that will dig into the product with their not-so-soft bristles eg. this cheap no-name drugstore brush with quite sturdy and kind of rugged hair which I believe is goat. I use this brush with my Chanel Les Beiges powder, which is really hard to dig out of the pan, while using this brush with my Hourglass ambieng Lighting Powder would be a terrible mistake as it would send clouds of dust in all directions, waste tons of expensive product and turn my face all moon-white.
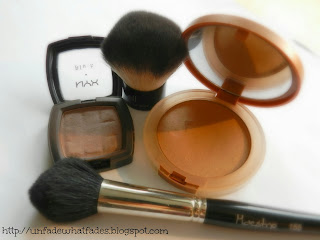 |
| ELF Studio Kabuki and Maestro 155 |
Now time to add a bit of shape and colour. I'd normally start with a bronzer which I like to apply with a full, round brush like the ELF kabuki mentioned earlier. I've got two of these kabukis, but one of them is substantially smaller and this is the one I use for bronzer. When I want to contour, just like with cream bronzers, I like to use a round tapered brush (Maestro155), but this time the brush is made of goat hair. This kind of brush picks the right amount of pressed bronzer and fits in the hollows under my cheeks well and makes it possible for me to draw the contouring 3s from my forhead to my chin effortlessly. Initially I used my Hakuro14 for that purpose, but I find that the Maestro does a better job when using a product of harder consistency, like the NYX blush in Taupe. If I used something more pigmented or softer I'd reach for the Hakuro to avoid exaggerated results.
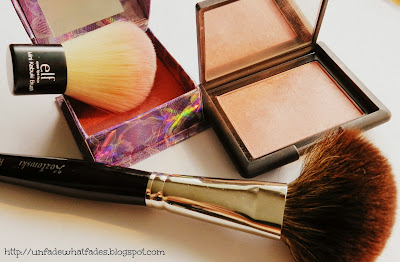 |
| ELF Bamboo Mini Kabuki and Kozlowski R-CB 635 |
On to some blush. I prefer to build up some colour rather than look like a clown, that's why I use a small and not very dense brush and my trusty one turns out to be ELF bamboo kabuki. This brush is meant for powder foundations, but I cannot really imagine buffing anything with something so feeble, whereas it's perfect for light-handed blush application. For blushes that lack in the pigmentation department or are less powdery I use my extravagant Kozlowski R-CB 635 made of racoon hair. This is a large, rounded, angled brush which is nice and soft but can be prickly if you rub it up the wrong way. Thanks to this feature it picks a nice amount of product and helps to blend it well. The shape of the brush would adjust to all cheek sizes, the more you press, the larger the circle you can draw will be.
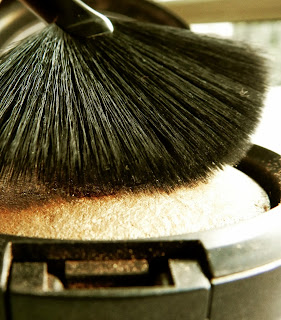 |
| ELF Studio Fan Brush |
And finally something to highlight. I have oily skin and what I want the least is shine, that's why I rarely reach for my highlighters. When I do, I want to go very lighthandedly and use a fan brush from ELF Studio line.
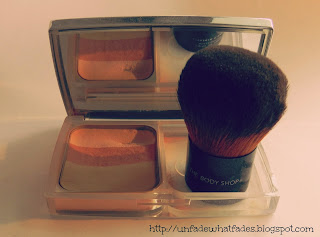 |
| The Body Shop kabuki brush |
I hardly ever use powder foundations, I've got only two of them in my possession and I rarely reach for them. But when I do I go for The Body Shop kabuki brush, which is a very dense brush made of natural bristles, which aren't as soft and fluffy as ELF kabuki, but stand upright. This brush picks a lot of product when swirled around, buffs the foundation in perfectly and allows to achieve really high coverage. Some people use ELF Studio kabuki to apply mineral foundation, I've tried that, and believe me working with the Body Shop's brush is more efficient and just quicker. Instead of adding layers and layers you achieve the coverage you want in one go.
I admit that in my collection there are some some brushes that are dupes of one another, but most of them were bought in sets and I usually bought the sets because they contained other brushes which I found so useful that I bought the entire set. Sometimes getting a set is also cheaper than buying individual brushes.
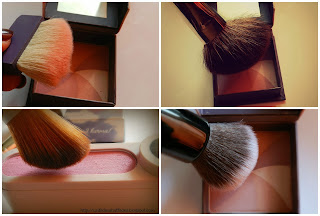
Sometimes you need a brush of a particular shape not because you like it that much but it's the only tool that matches fancy packaging. For example, like in the picture above the flat, angled brush attached by the manufacturer cannot be used to swirl the rainbow colours of the blush together. The large domed brush in the top right corner is first of all too big, and secondly thanks to its rounded, pointed shape it touches the blush right in the middle, digging a hole in the very centre without picking much of the multi-coloured blush. The flat angled brush, however, indispensible to use with the oval-shaped blush in the bottom left corner. A small rounded brush in the bottom right picture fits in perfectly and makes it possible to pick all the colours at the same time.
And the final reason why you need backups for your face brushes is that they take ages to dry. The drying time ofmost of my brushes is about 2 days or even longer, so in the meanwhile I need to use something else instead.
You must have also noticed that I use a lot of face brushes by ELF. I bought a couple of sets over 3 years ago and I believe they are some of the most versatile, high-quality and affordable brushes ever. I reach for them all the time, wash them thoroughly and regularly and never had any issues with them, that's why I've never felt the urge to replace them with Sigmas or MACs. Perhaps in the future.

No comments:
Post a Comment